
Even though Mt Myogi 1104m (妙義山 myougisan) is a two hundred famous mountain , I didn’t actually climb to the top (I thought about it though). The reason being that despite its relatively low altitude, this is a dangerous and difficult mountain to climb. I used to think that you could walk up every mountain in Japan, chains and ladders being placed in the dangerous parts, and also Mt Tsurugi (in the Northern Alps) was the most difficult mountain to climb in Japan. However, this title probably belongs to Mt Myogi. All the trails to the summit are marked with dotted lines, meaning “experts only” with multiple danger signs and worrying comments added into the mix (“50m chimney – a lot of people have died here”).
I ended up doing the scenic and safe tour along of the base of the mountain – not only were the views fantastic, but it also included some exciting parts that weren’t dangerous – as long as you’re sure-footed. Finally, Mt Myogi is one of the 3 sacred mountains of Gunma prefecture (the other two being Mt Akagi and Mt Haruna). There are shrines at the start, Myogi Jinja, and at the end of the hike, Nakanotake Jinja.
Hiking in Western Gunma 西上州
HOW TO GET THERE: I had been putting off going to Mt Myogi for years, since I had always thought it was hard to get to. I first saw this mountain while staying overnight with friends in Tomioka; it seemed an exciting climb because of its rugged peaks, but at the same time it seemed really remote. So I was surprised when it took around 2 hours from Ikebukuro station to get to the closest station, Matsuida, on the Shin-Etsu line, a couple of stop before Yokokawa (transfer in Takasaki). The view from the station exit was stunning – there were no surrounding mountains and Mt Myougi seemed quite close. I could also see a snow covered Mt Asama just behind it. Unfortunately, I didn’t take a photo, thinking I would get a better view on the hike, but never did.
There is no bus from the station to the start of the hiking trail. You could walk along the road or take a taxi to Myougi shrine (one hour / 4 km). On the other hand, a taxi takes about 10 minutes and costs about 1400 yen. I’m not really sure about the exact price, since I was able to share the taxi with 3 other hikers, and we split the fare – I paid only 400 yen. One thing I can say for sure is that demand exceeds supply; there were more hikers than available taxis, and I had to wait for a taxi to complete the round-trip before I could get a ride. I still managed to be at the start of the trail just before 10 am – two hours and a half after leaving Ikebukuro station.
There is a bus running from Joshu-tomioka station on the Joshin Dentetsu line, south of Mt Myogi, but not only does it take longer to reach that station by train, the bus also takes forty minutes, basically adding one hour to the travel time, so I wouldn’t recommend going this way.
Ask for a hiking map for the Mt Myogi Chukan path
THE ROUTE: From the taxi drop off point, I headed up the street on the right to the Myogi shrine and to the start of the hiking trail beyond it. In some respects the base of this mountain is similar to Mt Tsukuba – many people visit it to see the shrine and pray. My original plan was to walk the Chukan path (中間道 meaning the middle path) along the base of the mountain. However I wanted to add on a loop that would take me close to the easternmost summit and where I could get some good views (according to my map). Since I had planned to return by taxi, for once I had no concerns about having to hurry to catch a bus at the end of the hike, except maybe getting off the mountain trail before it gets pitch black (after 5pm in this season).

Sugi and Momiji (Cedar tree and Maple tree)

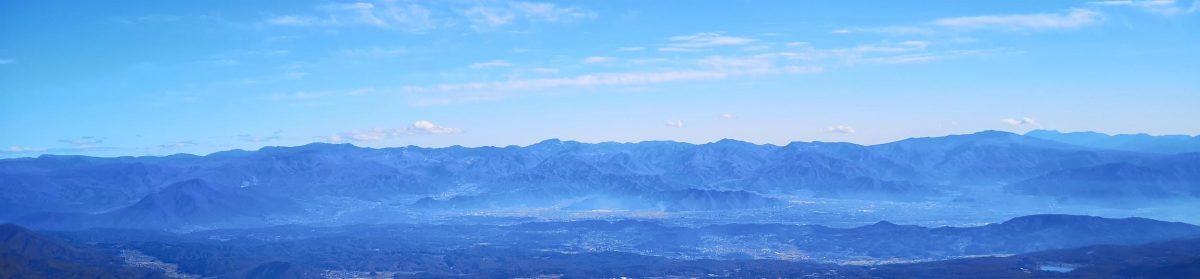
Mt Haruna, one of Gunma’s sacred mountains
Once I was past the Shrine grounds, I left the bulk of the sightseers behind me. I soon saw beautiful momiji (maple leaf tree) showing off beautiful autumn colours. Although the “Koyo” season had already ended on the higher parts of the mountain, it was now in full swing around the base. The path soon started to climb. I propelled myself up the steeper inclines with the aid of the chains lining the path. At this stage, it wasn’t really dangerous, one could easily walk up, but using the chains made it easier on the legs (as long as one has gloves).

Mt Hakuun, so close yet inaccessible

The Southern part of the Myogi range
At one point I reached a huge boulder with chains that supposedly had a viewpoint on top. Thanks to my long legs and arms, I clambered to the top in a matter of seconds. I was standing next to a big-sized “big” Chinese character. The view was great, since it was a blue sky day. In front of me stretched the Kanto plain. To the south was a mass of peaks forming the Northern part of the Chichibu mountains. To the north, I could clearly see the massive bulks of Mt Haruna and Mt Akagi. In the far distance I could make out the snow covered peaks of Mt Hotaka, Mt Tanigawa and various other peaks of the Joshinetsu-Kogen National Park. Winter had definitely arrived to that part of Japan. And of course, just behind me, was one of the steep and rocky peaks of Mt Myogi, Mt Hakuun.

Autumn Colours galore

Believe it or not, there is a ridge route following the top
I had to wait a little to clamber down again since the the rock was currently being tackled by a rather cautious hiker. Finally, I was able to get back onto the hiking trail. Very soon I reached a junction where one route continued straight to the summit, and the other, heading left, went down again, and connected with the Chuukan path. I decided to check out the summit trail before taking it.
Within minutes I was scrambling over rocks again and holding on to chains, but nothing I hadn’t done a hundred times before on other mountains. Finally a reached some steps leading to a ladder, at the top of which was a cave. I ventured inside and discovered a small shrine. On the other hand, there was no more path, just a wall of vertical rock. I retraced my steps, and managed to pick up the trail again to the right of the steps, beyond a towering cedar tree. I wasn’t surprised I had missed it since it wasn’t a path but a steep rocky incline with a chains and some footholds. Now I’ve done a few of these before but none quite as long or as steep. I pulled myself up halfway, but I didn’t feel all that safe – a fall would result in more than a few bruises – so I decided end my little reconnaissance there, and get on with the main hike.

The craggy peaks of Mt Myogi
Past the trail junction, there was another passage with chains, as well as some sunny viewpoints. I stopped at one of them to have lunch. Eventually I joined up with the Chuukan path. It was a very pleasant up and down path (more up than down). There were some truly fantastic autumn colours along the way, and I couldn’t believe how few people there were. Later on, I read on the internet that thousands of people were on Mount Takao the same day.
After a while I reached a series of steps taking me very close to the top of one of Mt Myogi’s peaks. I didn’t expect the trail to go that high, perhaps 1000m, but it was hard to tell from the map. At this point the skies had clouded over a little, but the views were still above average. I was now walking along the base of a cliff. At times the path was carved inside the cliff, like a cave, forcing to walk bent over. This was undoubtedly one of the highlights of the hike!

The long staircase

The low overhang
Later on, I arrived at a viewpoint, reached by a series of rocky up and downs fitted with chains. There were more people here since this spot is closer to the other end of the Myogi range, where there is a shrine and a car park. While waiting for my turn to go down the chains, I took lots of photos of the mountains stretching away to the south. There was one especially that caught my eye – Mt Arafune. It had a very long flat top like a table, quite an intriguing sight.

Lots of hiking possibilities

On the right, the flat top of Mt Arafune
At the end of the path, I was also able to enjoy a great view of Mt Myogi to the North. The sun had come out again, and the whole range was bathed in a late afternoon sunlight, perfect for taking pictures. Once I was satisfied, I headed back to the main path, went down some more, under a rocky bridge, through a picnic spot and then up to another viewpoint, where I could check out the rocky crags I had clambered over just a few minutes before.

The northern part of the Myougi range

Not an easy path
The sun was slowly, but surely, heading for the horizon. I continued my descent, and quickly reached Nakanotake shrine. It was nice to start and end the hike at a shrine. I passed through quickly and got back on the road for the last part of the hike. It took me another hour to get back to my morning starting point. Along the road there were excellent views of some of Mt Myogi and surrounding mountains. The blue skies had returned, so even though the sun had already set it was still light.

Typical Myougi landscape

Mt Kondou the other main Myogi peak
Soon I entered a hiking path going down through a forest, a shortcut since the road make a big loop Eastwards. Very soon I was back on the road. I finally arrived at the turn-off for Momiji no Yu, a very conveniently located hot spring. After a nice hot bath, I called for a taxi; the return leg was more expensive, about 2300 yen, but since it had me almost nothing on the way there, I didn’t mind at all.
CONCLUSION: A medium-level hike with some thrills and great views, suitable for non-experienced hikers, and especially beautiful in the autumn. If it weren’t for the taxi ride there and back, and some road-walking, it would be the perfect hike!
Ask for a hiking map for the Mt Myogi Chukan path

Nearly full moon tonight

Great views on the walk back as well


You must be logged in to post a comment.